Settings to emojify and prettify your terminal (iTerm2 & ZSH)
- Published at
- Updated at
- Reading time
- 6min
I'm jumping back and forth between iTerm2 and Hyper for quite a while now. Hyper is beautiful, JavaScript-extensible and provides a very clean and reduced look.
Unfortunately, it felt always a few milliseconds slower and less responsive than iTerm to me. This tiny difference led me to come back iTerm2 even though I found Hyper visually more appealing.
With the release of v3.3 of iTerm2 (I only just recently noticed this version mixup – v3 of v2 🙈) a Minimal and Compact theme entered the stage. That motivated me to prettify my iTerm2/ZSH terminal.
Today, I'm very pleased with my setup, and people asked me to share my settings – so here we are!
Before we start: I use the latest iTerm2, zsh, and oh-my-zsh. Most but not all of the described things work in a different environment.
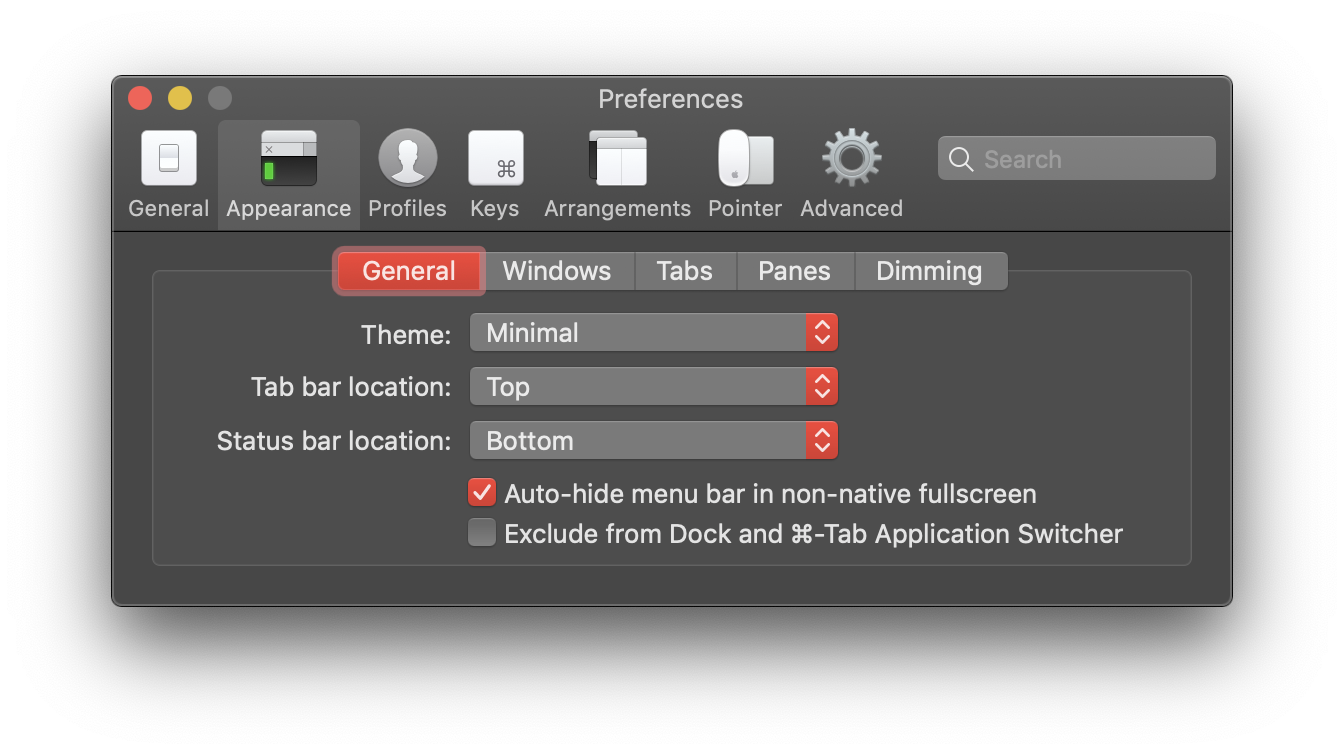
You can find the new theme selection under Settings > Appearance.
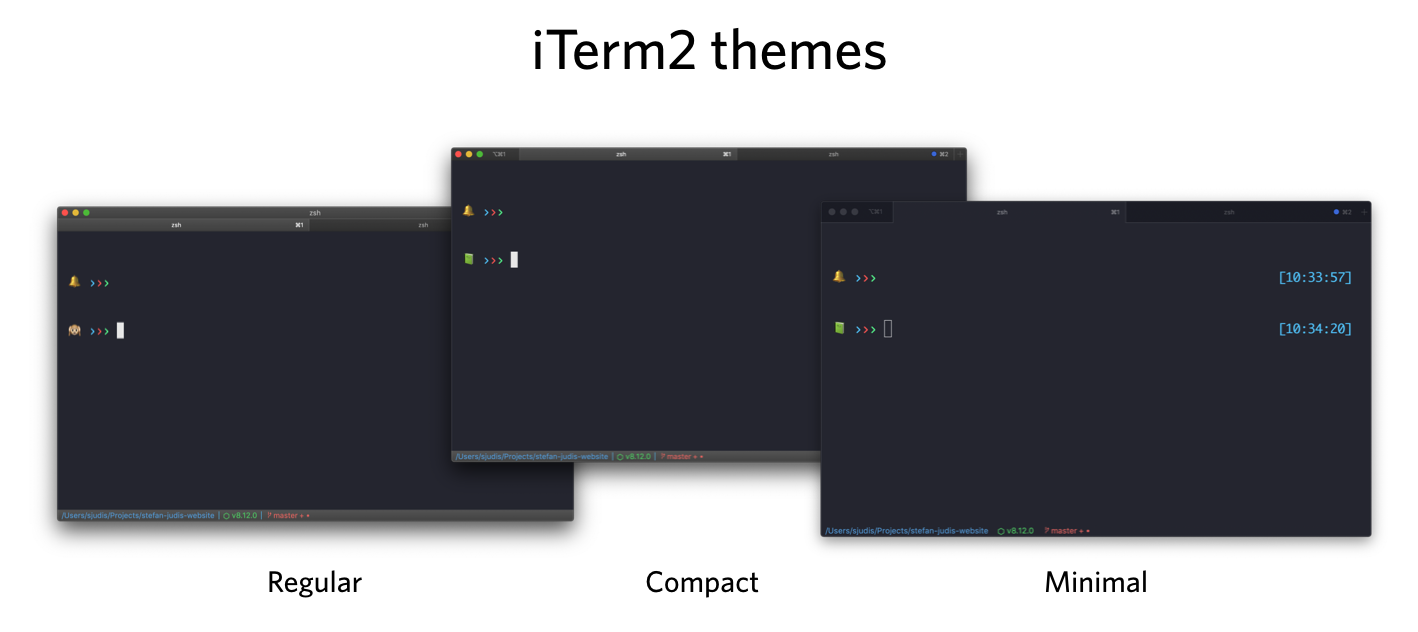
The themes differ in the top and bottom bar. 👇
If you looked closely, you probably noticed that you can also configure the position of the status bar, which comes next, in this dialog. I prefer it to be at the terminal bottom.
You can set the elements inside the status bar under Profiles > Session and find it a "Configure Status Bar" button in the bottom.
The new status bar provides a bunch of elements to display battery status, git status, and other useful things.
Unfortunately, there is no element showing the current Node.js version (yet). Additionally, the Current Directory element shortens the file path when you use Prefer tight packing to stable positioning (it moves all the items to the left), which you'll find under the advanced settings.
To solve these issues, you can use the Interpolated String element which enables you to display whatever you want right in the status bar.
Custom variables in the status bar
To set custom iTerm accessible variables, have a look at this tutorial. You have to enable the shell integration and to define a iterm2_print_user_vars function.
# .zshrc
test -e "${HOME}/.iterm2_shell_integration.zsh" && source "${HOME}/.iterm2_shell_integration.zsh"

iterm2_print_user_vars() {
  # extend this to add whatever
  # you want to have printed out in the status bar
  iterm2_set_user_var nodeVersion $(node -v)
  iterm2_set_user_var pwd $(pwd)
}
For me, these are defined in my .zshrc. You see above that I define pwd and nodeVersion, which then are available in the Interpolated String element under user.
These are my primary iTerm settings. Let me share some other minor things...
The color theme
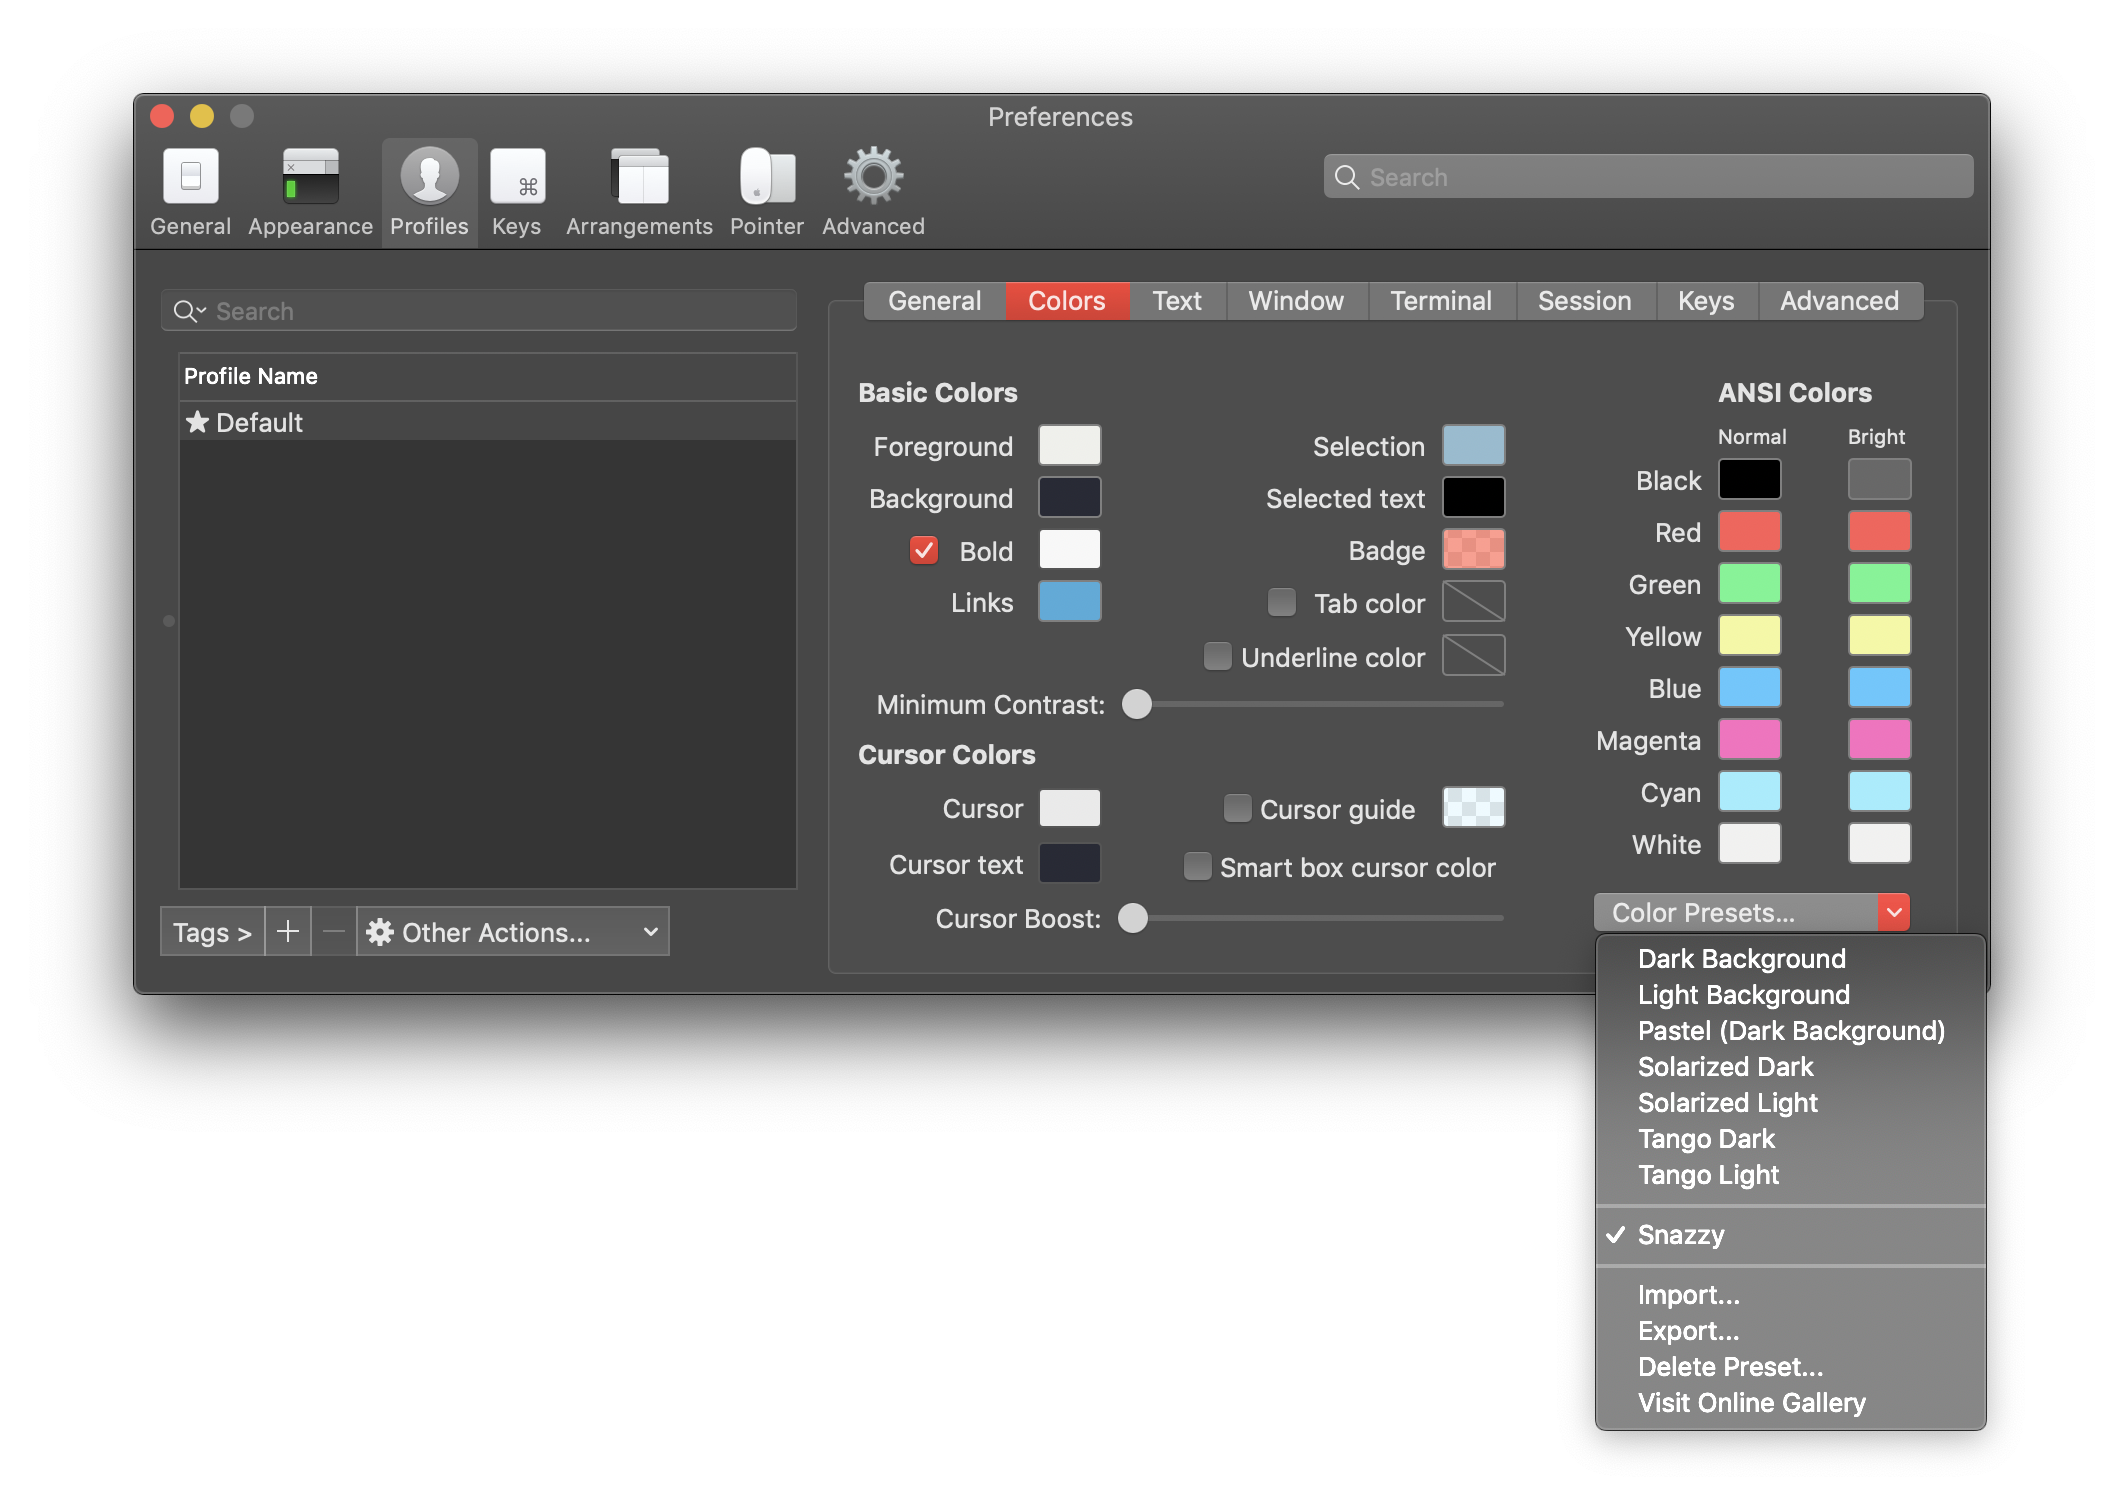
I use Sindre Sorhus' Snazzy color theme.
More space inside of the terminal window
And I like it to have a little bit of padding in my terminal which you can define in the advanced iTerm settings when you search for margin.
As I'm using oh-my-zsh, the command highlighting and suggestions come out of the box. oh-my-zsh provides a bunch of useful plugins.
These are the ones I use:
# .zshrc
plugins=(git node npm github zsh-syntax-highlighting zsh-autosuggestions git-open)
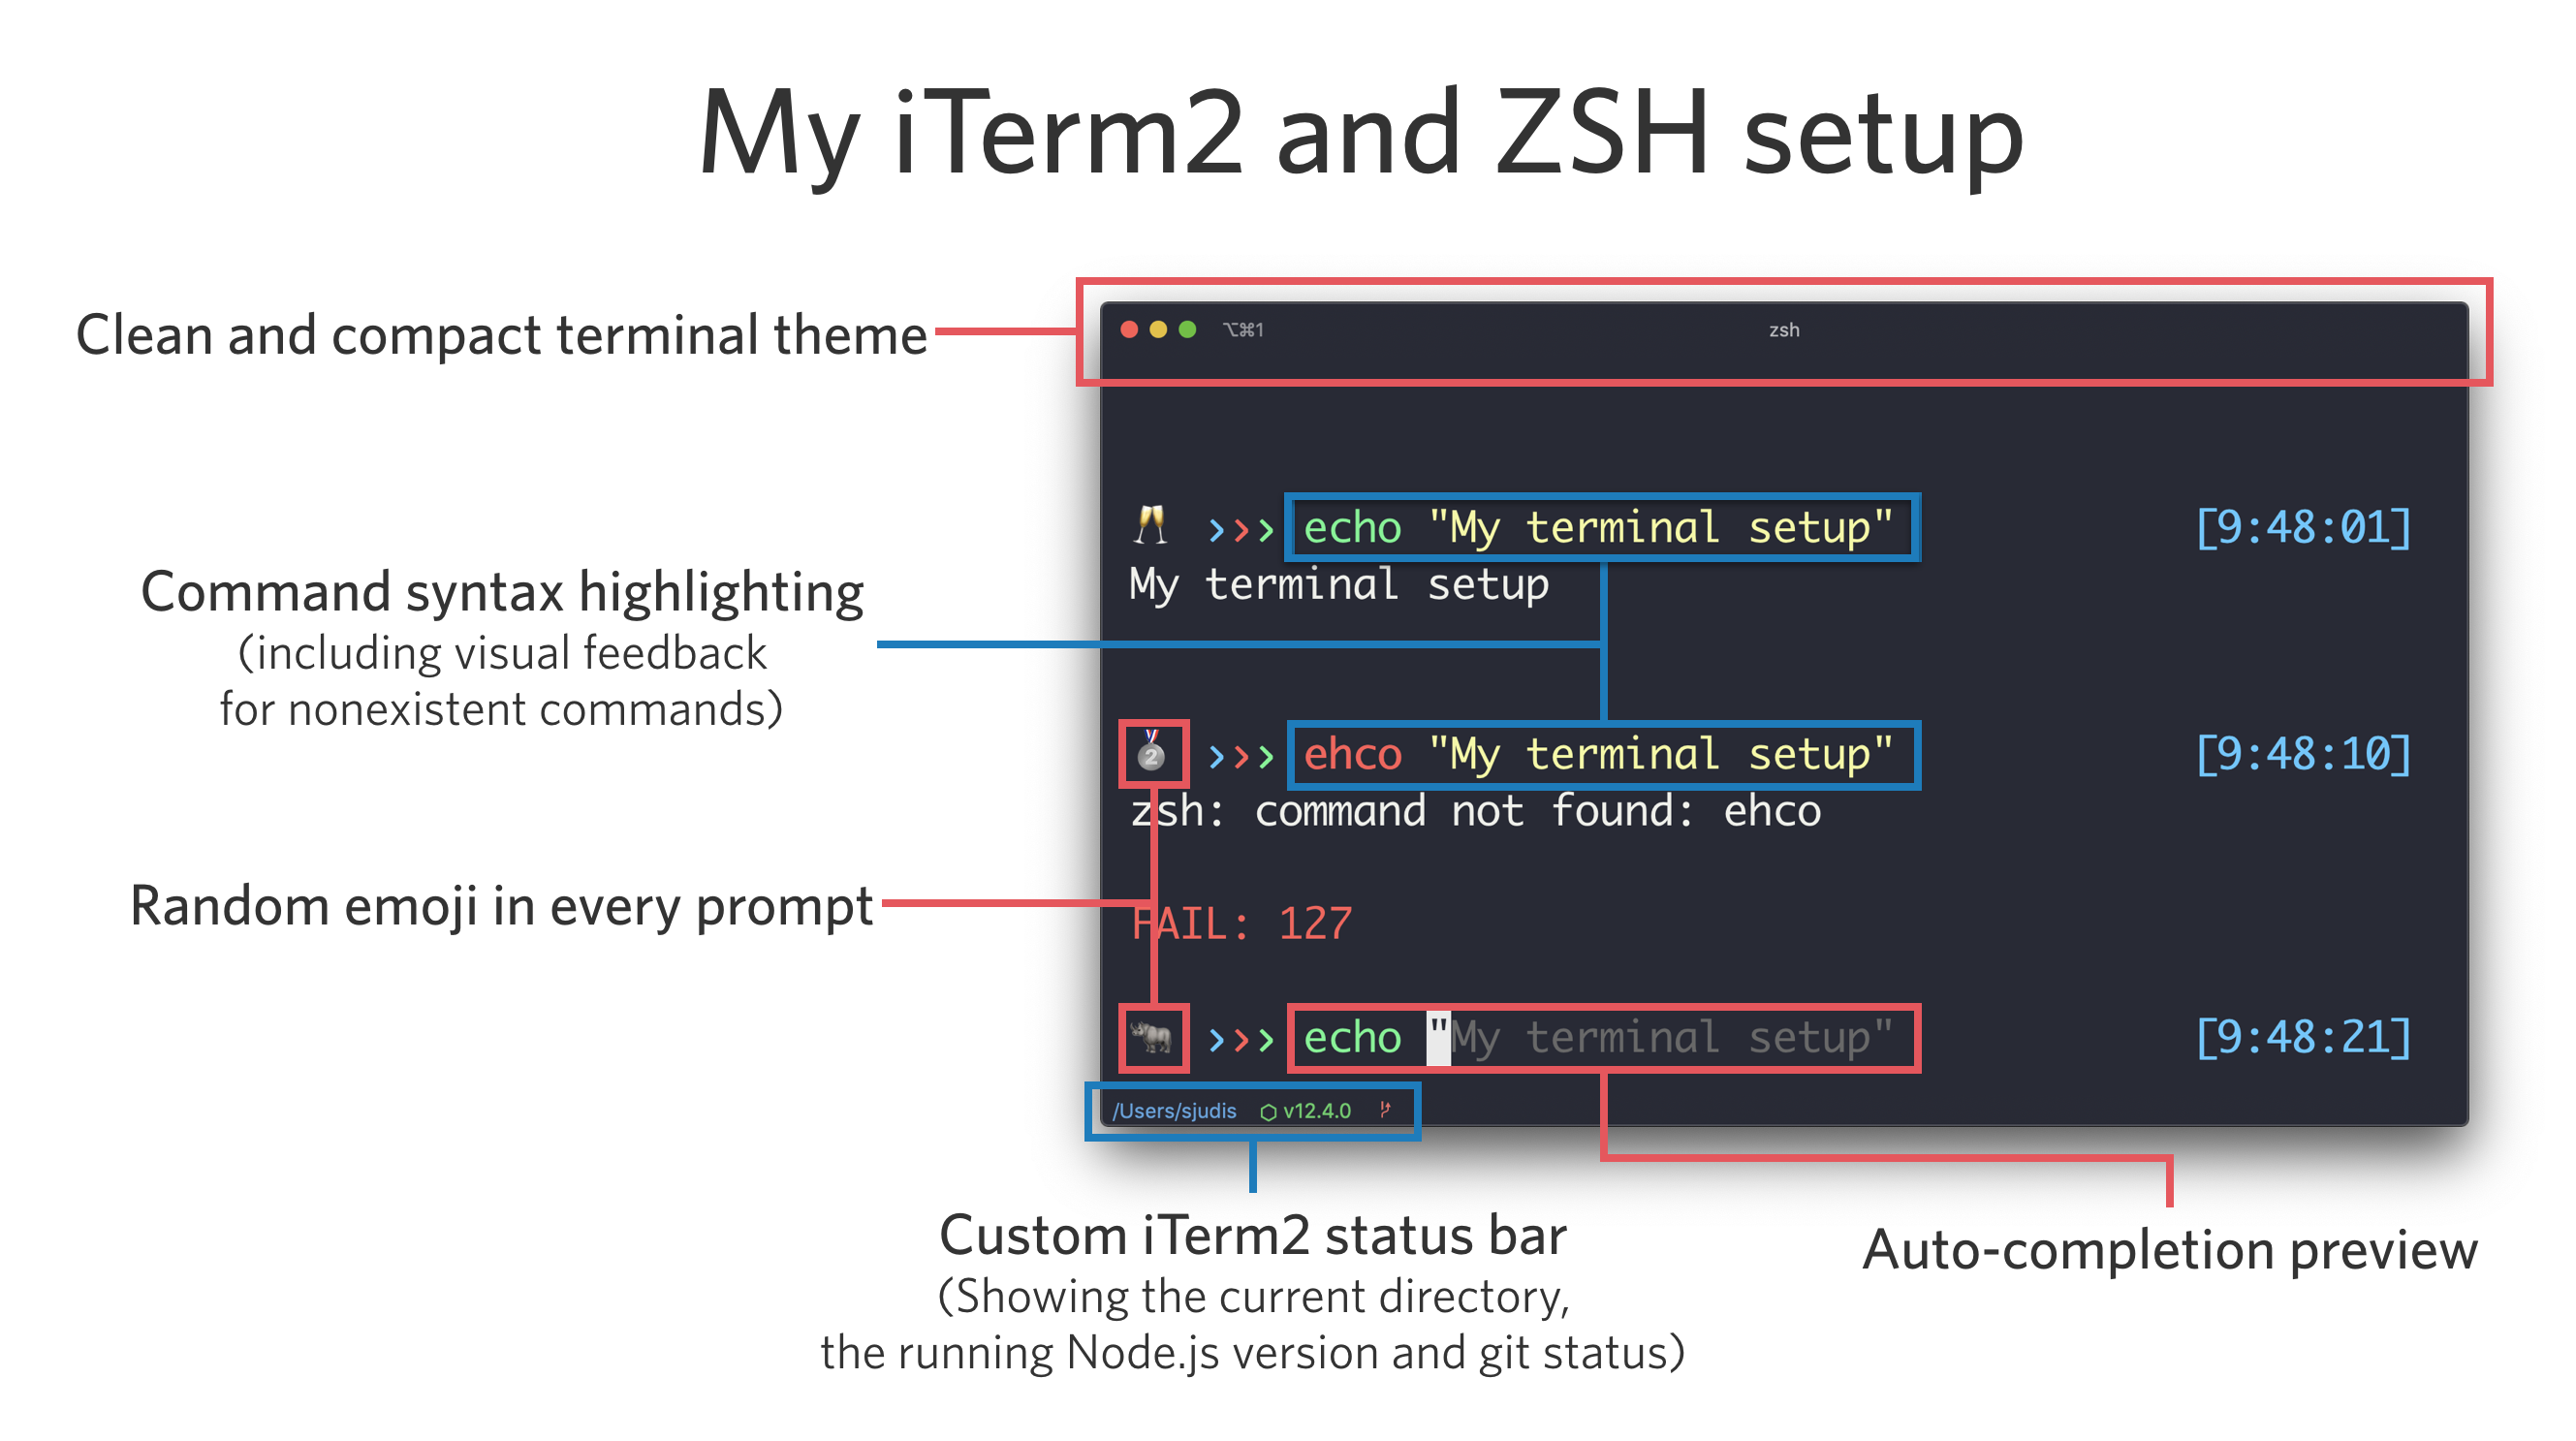
zsh-syntax-highlighting and zsh-autosuggestions are the plugins highlighting the current command inline and also showing suggestions from the command history. Have a look at the plugins listing; there is more good stuff in there.
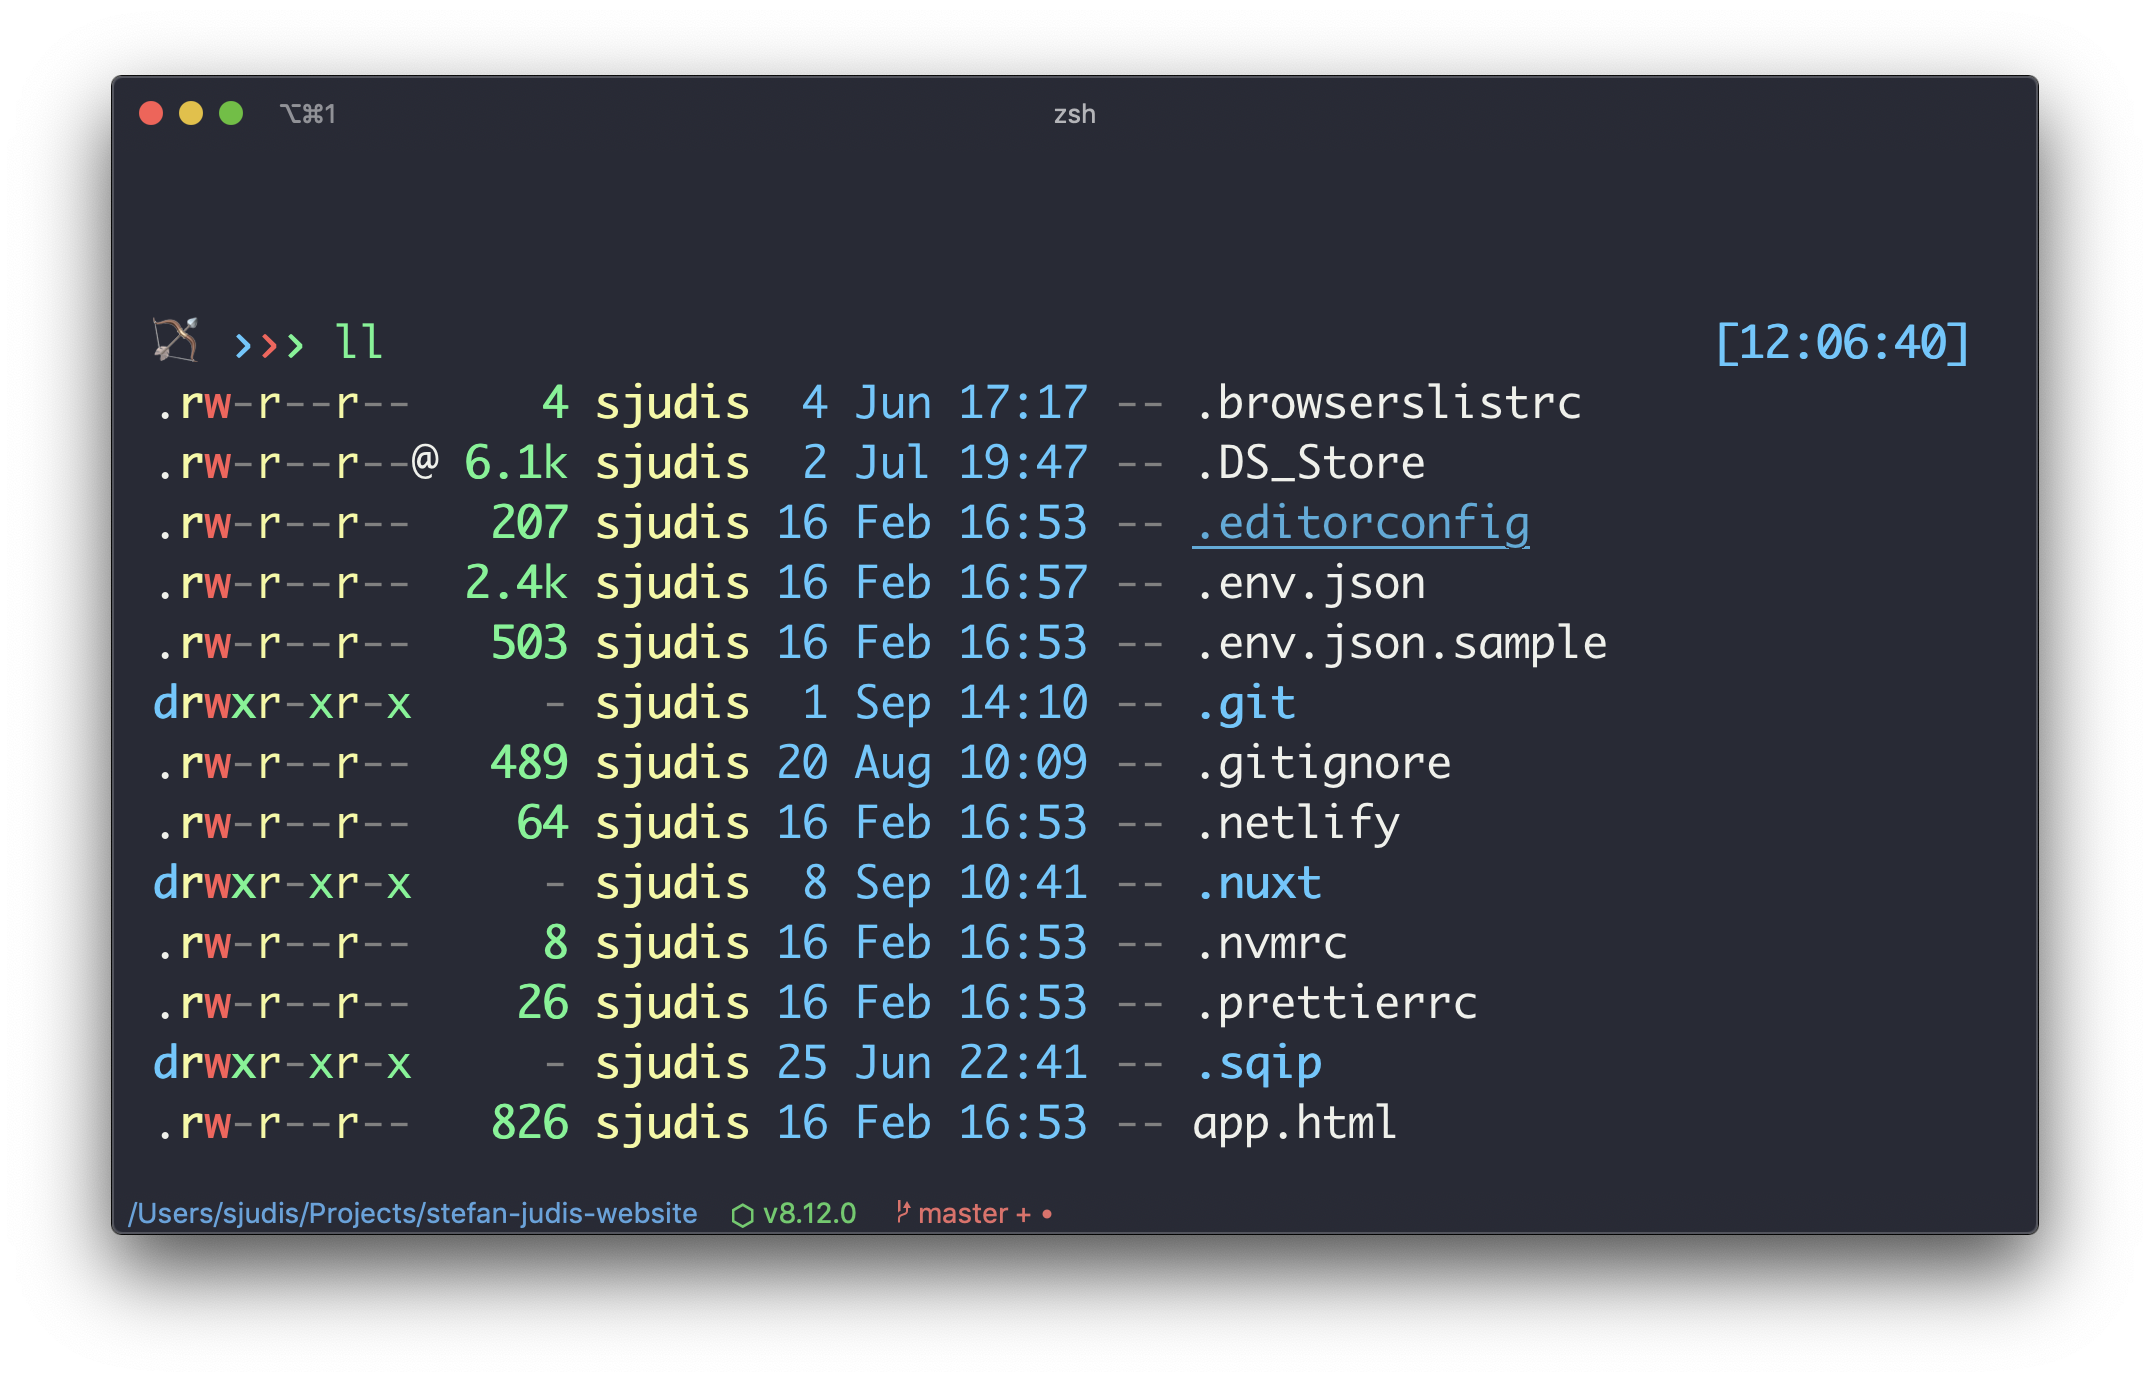
The theme doesn't include much fanciness except the emojis. I copied the idea from Mathias Buus who showed his terminal in a talk years ago, and he was so kind to give me an initial implementation.
Overall, it's a collection of emojis that are accessed with a random number inside of the terminal prompt. In case you ran into a problem with emojis in the past... iTerm doesn't render all available emojis with the same width. Yes, I went through all of them one by one to not have a jumping terminal prompt.
This led to 665 different emojis rendered in my terminal prompt.
# stefan-judis.theme
PS1_EMOJIS=("😀" "😃" "😄" "😁" "😆" "😅" "🤣" ...)
NUMBER_OF_EMOJIS=${#PS1_EMOJIS[@]}
THEME_DELIMITER="%{$fg_bold[blue]%}›%{$reset_color%}%{$fg_bold[red]%}›%{$reset_color%}%{$fg_bold[green]%}›%{$reset_color%}"

PROMPT='
%(?, ,%{$fg[red]%}FAIL: $?
%{$reset_color%})
${PS1_EMOJIS[$RANDOM % $NUMBER_OF_EMOJIS]}  $THEME_DELIMITER '

RPROMPT='%{$fg_bold[blue]%}[%*]%{$reset_color%}'
You can change the delimiter with the THEME_DELIMITER variable. Currently, it's three colored arrows.
Because I'm using oh-my-zsh the theme also includes provided color handling (e.g. $fg_bold) and functionality like the current time with %*.
I use PROMPT to show the emojis and RPROMPT to display the current time on the right side.
The emoji part should work just fine in any shell environment. If you want to have a look at the theme on GitHub, here we go.
In case you have weird blue triangles in your terminal after copying the theme have a look at this GitHub issue.
A colorful list command
To have a look at files in a directory, I use exa, which makes the output more beautiful and also has a bunch more settings than the default ls. I have it aliased to ll.
Navigate from anywhere to anywhere
I'm rarely navigating somewhere with the whole path. And while many tools let you go somewhere quickly, I stuck on autojump which is aliased to j.
# navigate to /Users/stefan/projects/.dotfiles
# using autojump from anywhere
$ j dotfile
A quicker clone
When I clone repositories from GitHub, I use a custom clone function. It automatically clones a repository, navigates into it, and performs npm install if there is a package available.
# Usage:
# $ clone git@github.com:random-mdn/random-mdn-serverless.git
clone() {
  git clone $1
  cd $(basename ${1%.*})
  if test -f "./package.json"; then
    echo "..."
    echo "Found package.json... installing dependencies"
    echo "..."
    npm install
  fi
}
A better cat
The usually available cat command is aliased to bat which is "a cat clone with wings", and it's so good. It automatically does syntax highlighting and shows git modifications. I love it!
And that's it friends!
Feel free to snoop around in my dotfiles for more things. The repository doesn't include a proper Readme, but usually, there are comments next to the commands and definitions.
Have a wonderful day!
Join 6.4k readers and learn something new every week with Web Weekly.
